- Software
- Zencrack Support
Zencrack GUI
Zencrack Support
Zencrack GUI
This page addresses some issues that may occur with the Zencrack GUI and explains how to resolve them.
Zencrack GUI gives error "Failed to execute script zcrgui" (v8.3 or later)
A small window containing the message "Failed to execute script zcrgui" means that there has been a fatal issue during execution of the GUI.
For interactive GUI sessions this may occur as the GUI starts. If the GUI is running in the background to perform remeshing during a Zencrack job, this may occur if there is a fatal error during the remeshing process which is not handled by the code.
In either case, there may be a traceback message in the GUI log or error files. These are located in the user home folder or the installed Zencrack GUI sub-folder, depending upon the Zencrack version and the configuration.
For Windows 7 and 8 the Zencrack GUI (v8.3 or later) requires that certain Visual C Runtime libraries are installed and if these are missing, the GUI execution will fail with a message "Failed to execute script zcrgui". To resolve this issue please install the latest Microsoft Visual C++ Redistributable runtime files for Visual Studio 2017 (vc_redist.x64.exe) by searching at:
https://support.microsoft.com/ for "Visual C++ redistributable"
or
https://learn.microsoft.com/en-us/cpp/windows/latest-supported-vc-redist
Installation of the Visual C Runtime files requires that certain updates are already installed on the system. If the Visual C Runtime installation fails, please check that the system is up to date in terms of Windows updates.
Note also that:
- the Zencrack GUI (v8.3 or later) requires SP1 if used on a Windows 7 machine.
- we no longer formally support installation of Zencrack on Windows 7 and Windows 8 machines.
Partial lines are displayed on element faces (v7.9)
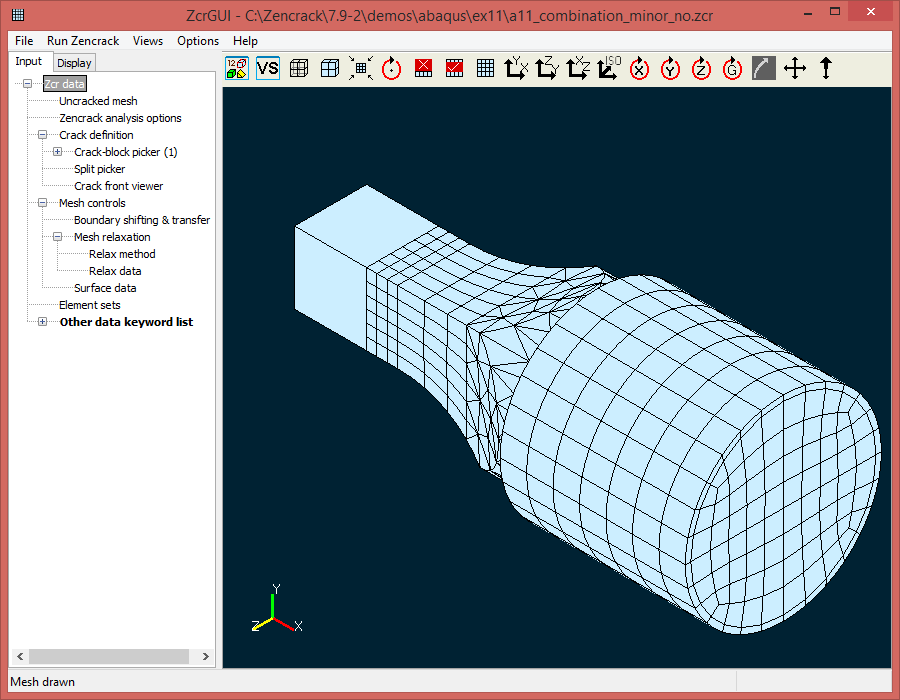
Some NVIDIA graphics cards may display partial lines across element faces when the default settings are used. An example is shown below.

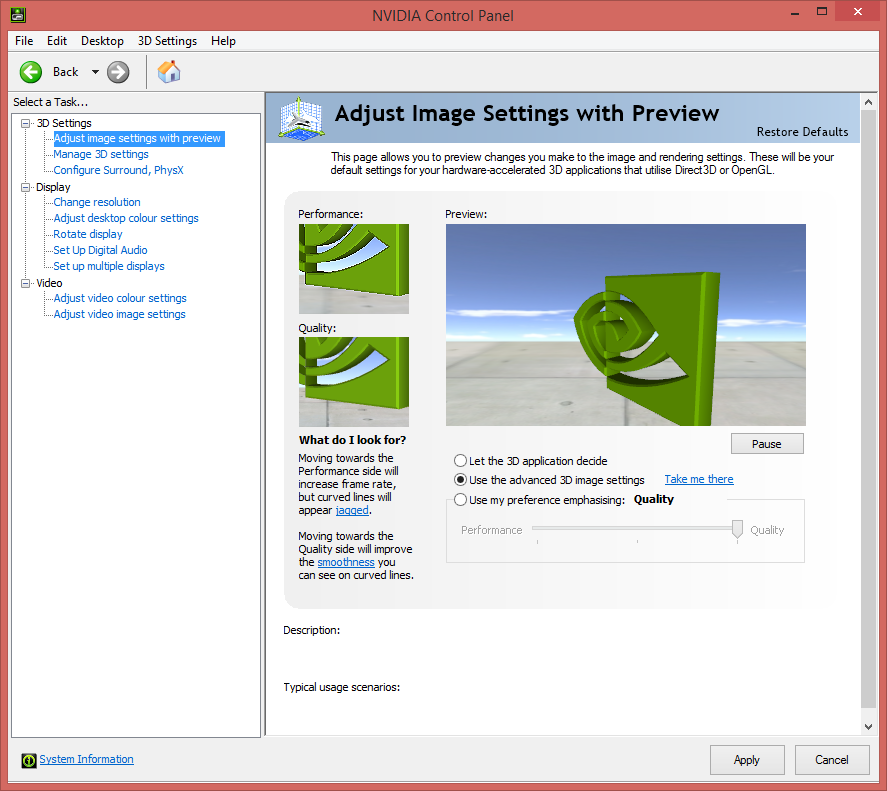
The solution is to define some specifc 3D settings for the Zencrack GUI in the NVIDIA Control Panel. Screenshots here are for Windows 8 but the same approach applies to Windows 7 and Windows 10.
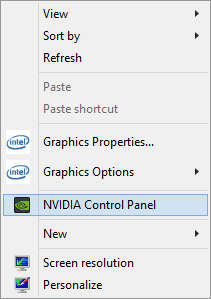
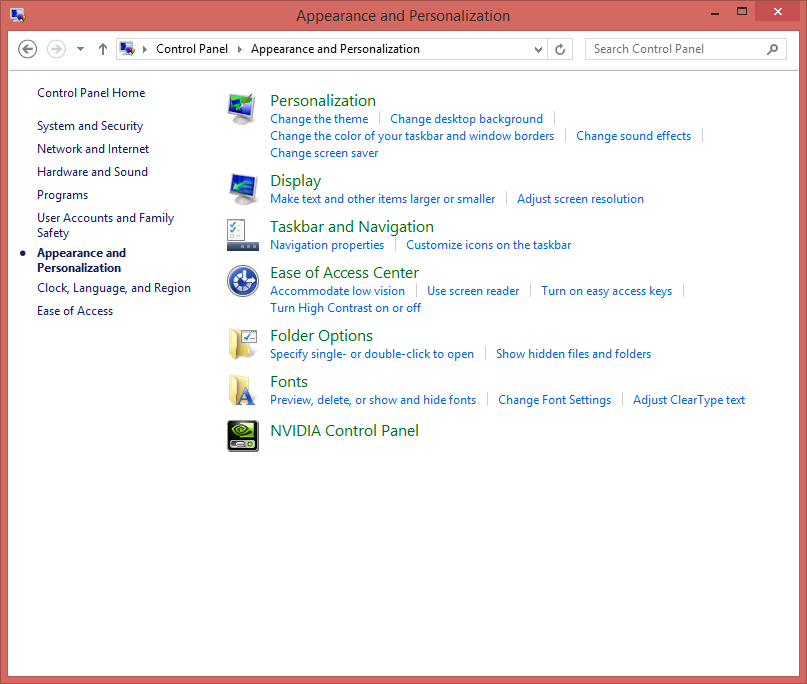
There are several ways to start the NVIDIA Control Panel: right-click on the desktop and choose NVIDIA Control Panel, or, click on the NVIDIA icon in the notification area of the taskbar, or select the NVIDIA Control Panel from the Appearance And Personalization or Hardware And Sound sections of Windows Control Panel.
In the NVIDIA Control Panel:
- Select the "Adjust image settings with preview" screen from the tree in the left pane.
- Check the option "Use the advanced 3D image settings".
- Select "Manage 3D settings" from the tree or click on "Take me there" next to the option to use advanced 3D settings.
- Select the "Program Settings" tab on the "Manage 3D settings" screen.
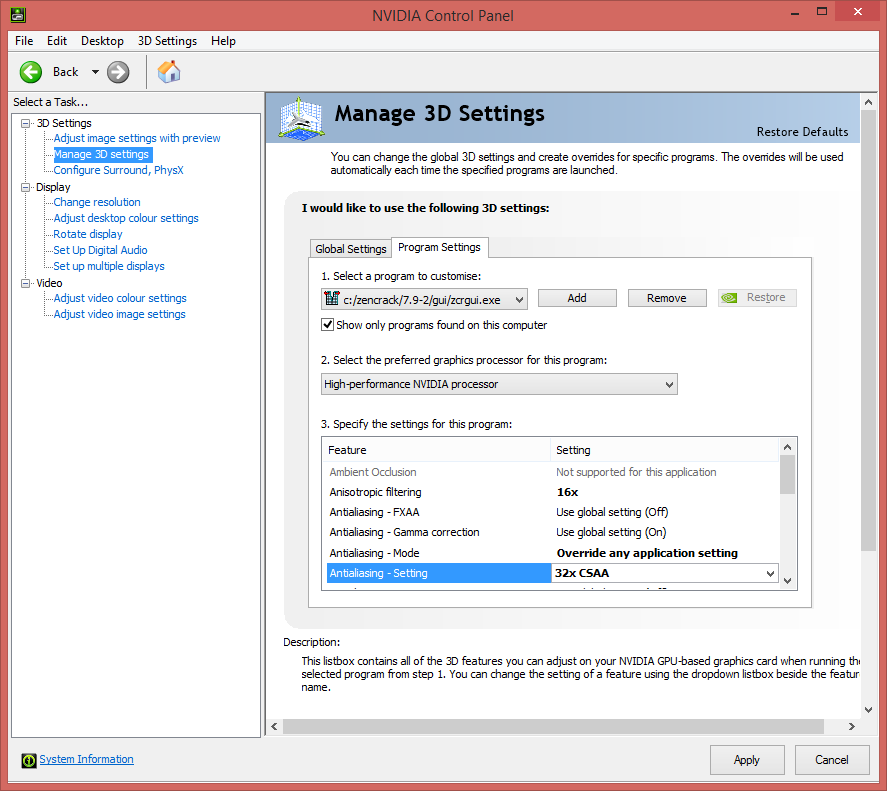
- In item 1: Click "Add" and browse to select the GUI executable file e.g. c:\zencrack\7.9-2\gui\zcrgui.exe.
- In item 2: Set "NVIDIA processor" (see below for additional comments regarding this item).
- In item 3:
- Set "Anisotropic filtering" to the highest value available.
- Set "Antialiasing - Mode" to "Overrride any application setting".
- Set "Antialiasing - Setting" to the highest value available.
- Click on "Apply"
If the GUI is running when these changes are made, it must be restarted to see any effect of the changes.
The items 1,2 and 3 available in this example for the "Manage 3D settings" screen may appear differently on different systems. If a machine has on-board Intel HD graphics in addition to an NVIDIA card, then item 2 will be available as shown here. If only an NVIDIA card is available item 2 will be the list of items to be specified and there is no item 3. The contents of the list of items may vary slight between cards and driver versions.
These settings should resolve the display issue provided that the global 3D settings are at their default values. There may be combinations of global and program specific settings which still cause the issue. If this is the case, please send a full list of the global and program settings to Zentech for further investigation, along with your graphics card model, the driver version and the NVIDIA Control Panel version. A screenshot of a model display in the GUI would also be useful.
Selecting Intel HD or NVIDIA graphics
The example in the section above (Partial lines are displayed on element faces, v7.9) shows how to define the use of certain NVIDIA graphics
options for a system with Intel HD and NVIDIA graphics capabilities.
The procedure can also be used to ensure that the NVIDIA graphics are
used for the GUI rather than Intel HD graphics. (Depending on the
graphics card options that have been configured on a system, the GUI may
default to using Intel HD rather than NVIDIA graphics). In general the
NVIDIA graphics are expected to provide better image quality even if the
Intel HD options are set to "best quality".
Sample screenshots from the same system using Intel HD and NVIDIA graphics are shown below. The anti-aliasing capabilities of the NVIDIA card provide a subtly but smoother line definition than the Intel HD card.

If a laptop running on battery power is being used, the Intel HD graphics can be used on a one-off basis by right-clicking the GUI shortcut and selecting "Run with graphics processor -> Integrated graphics". This increases battery life compared to using NVIDIA graphics.
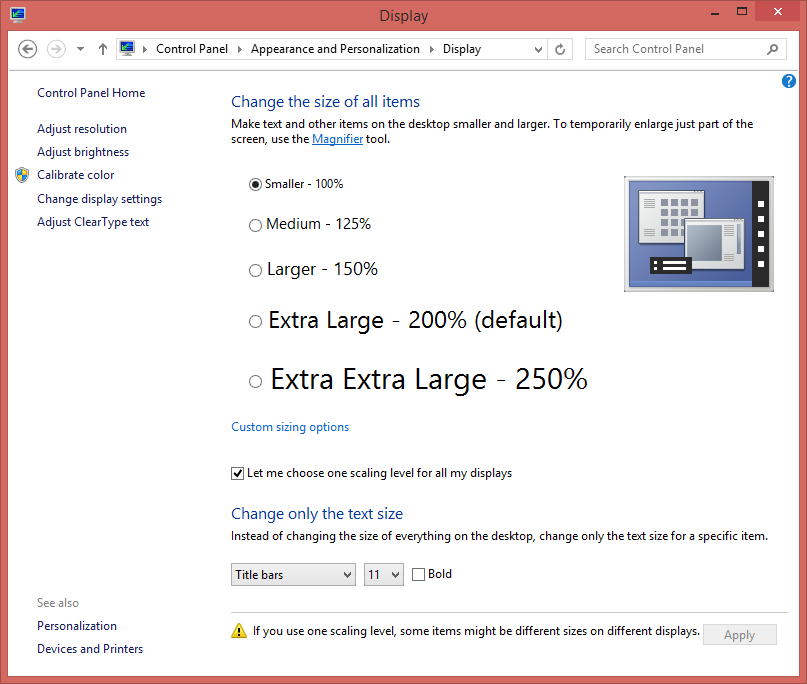
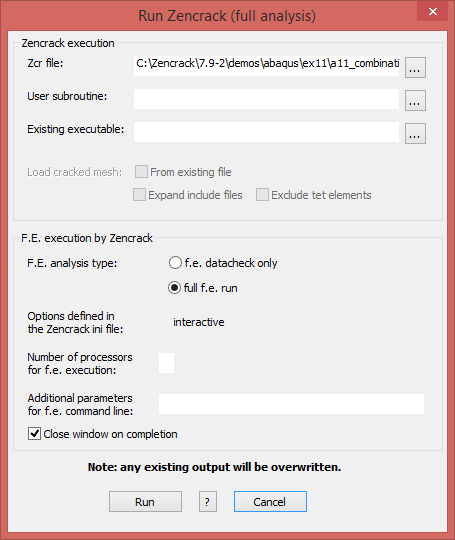
Screen content is not fully visible (v7.9-1 and 7.9-2)
Depending upon the scaling settings in Windows, content of some of the GUI screens may not be fully visible. This is known to be an issue when using 125% scaling in Windows 8. An example showing the Run Zencrack screen with missing Run and Cancel buttons is shown below.
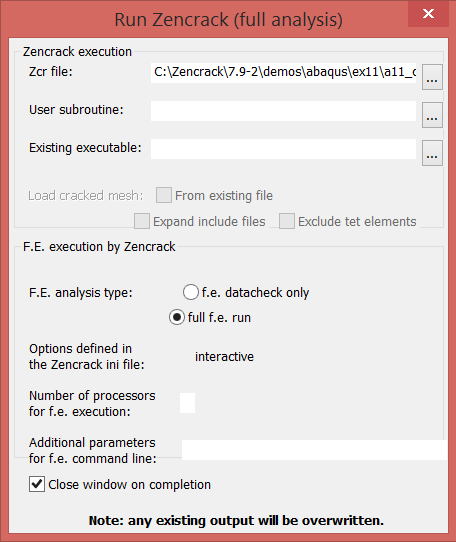
The solution is to use a different scaling value, for example 100%.
In Windows 8 four of the five standard settings can be used: 100%, 150%, 200%, 250%. The recommended value is 100%:
- Right click on the desktop and choose Personalize.
- In the lower left of the Personalization screen click on Display under the "See also" section.
- If you see a "smaller-larger" slider you can check "Let me choose one scaling level" to switch to the five explicit options, as shown below.
- Try the 100% or 150% settings. Changing this setting requires you to sign out and back in for it to have an effect.